
Equalizers are tool which allows you to modify how your system’s frequency responds. By increasing or decreasing specific frequency bands, an equalizer enables you to enhance or diminish certain aspects of sound such as bass, treble or vocals – thus improving sound quality of music, movies or games and making them more enjoyable.
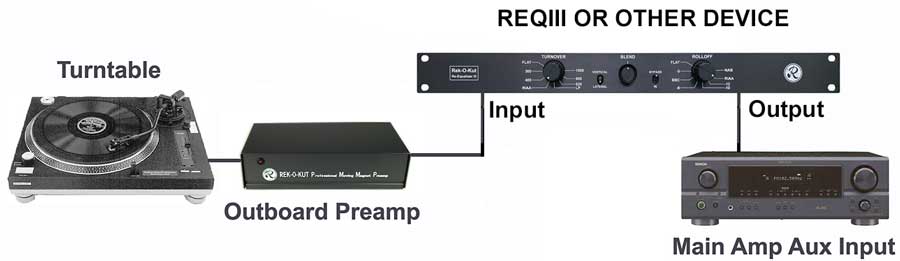
However, connecting an equalizer to your stereo receiver or amplifier may prove more complex without a tape monitor loop. A tape monitor loop consists of input/output jacks that enable users to insert an external device such as an equalizer between their source device and amplifier – so they can process audio before reaching speakers.
Many modern receivers or amplifiers don’t feature tape monitor loops, but that doesn’t stop you from using an equalizer. There are still ways of connecting an equalizer without one depending on which connections are available on your devices; we will show how in this blog post using preamp output and main amp input connections on receivers or amplifiers as examples.
What You Will Need
To connect an equalizer without using a tape monitor, the following equipment will be needed:
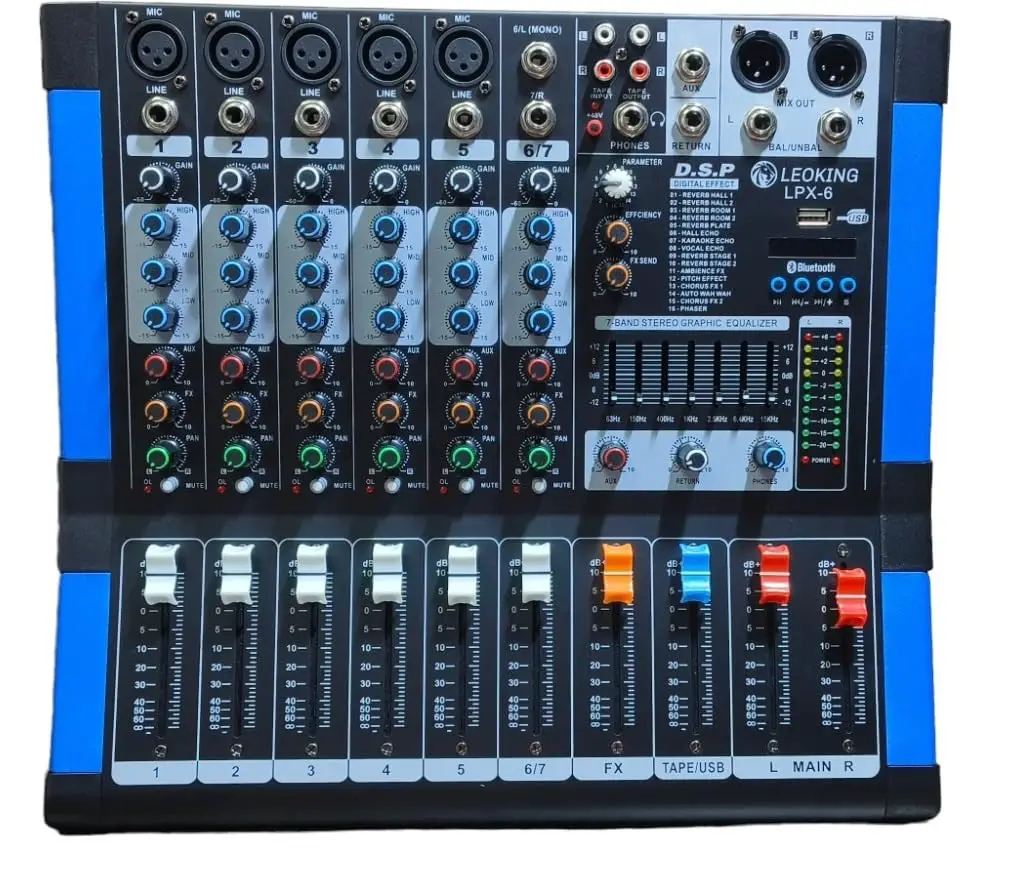
- Stereo receiver or amplifier
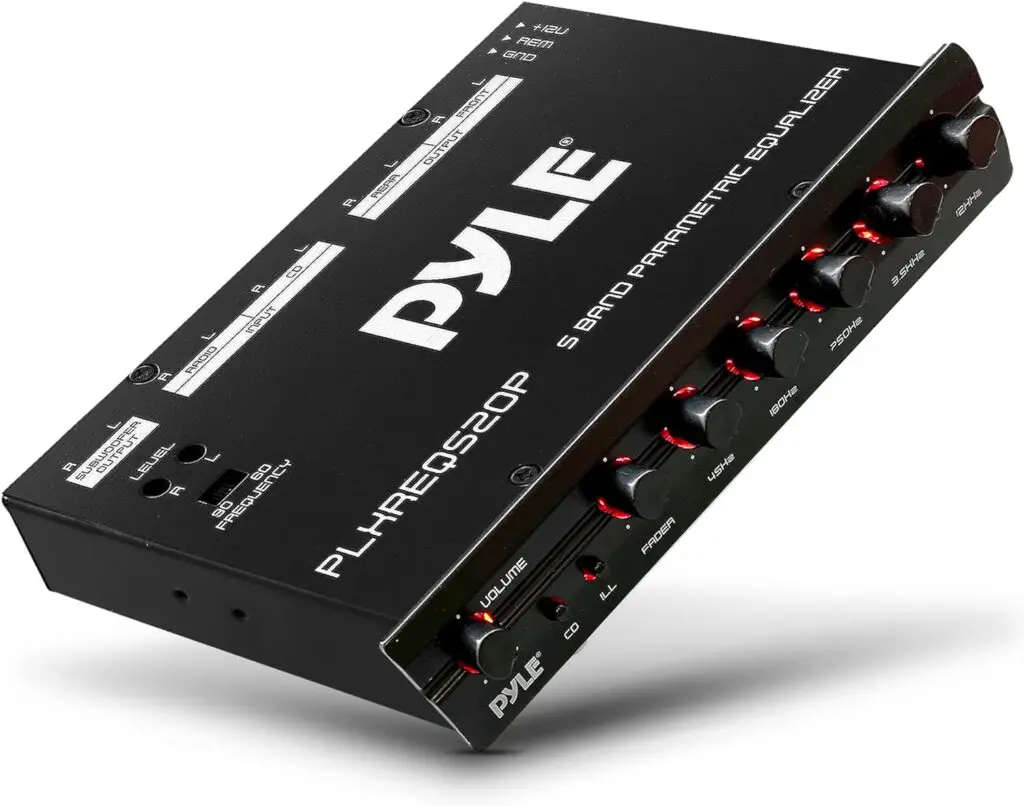
- Equalizer unit
- RCA cables
- Speaker wire (if necessary)
- Audio source (e.g., CD player, turntable, etc.)
Step-by-Step Connection Process
Here are the steps for connecting an equalizer without using a tape monitor, using only your receiver or amplifier’s preamp output and main amp input connections:
1. Determine the optimal placement: Before connecting your equalizer, carefully choose where it will sit within your audio setup. Make sure it is easily accessible while providing sufficient ventilation.
2. Identify the preamp output and main amp input: Locate the preamp output and main amp input connections of your receiver or amplifier, typically marked on its back panel or user manual, which are also sometimes referred to as pre-out and main-in. These allow you to isolate pre-amplification from power amplification stages on your device while inserting an external device such as an equalizer in between.
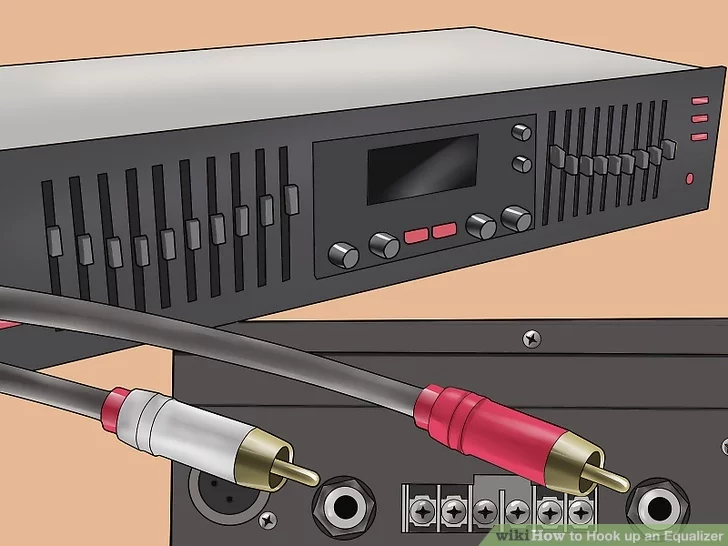
3. Connect the equalizer input: Place one end of the RCA cables into the preamp output connections on your receiver or amplifier and connect them. Make sure the left and right channels match up properly; color coding of cables and jacks often helps in this regard, with red being assigned for right channel and white or black for left channel.

4. Connect the equalizer output: Attach the other end of the RCA cables to their respective input connections on the equalizer unit, making sure to match up left and right channels accurately.
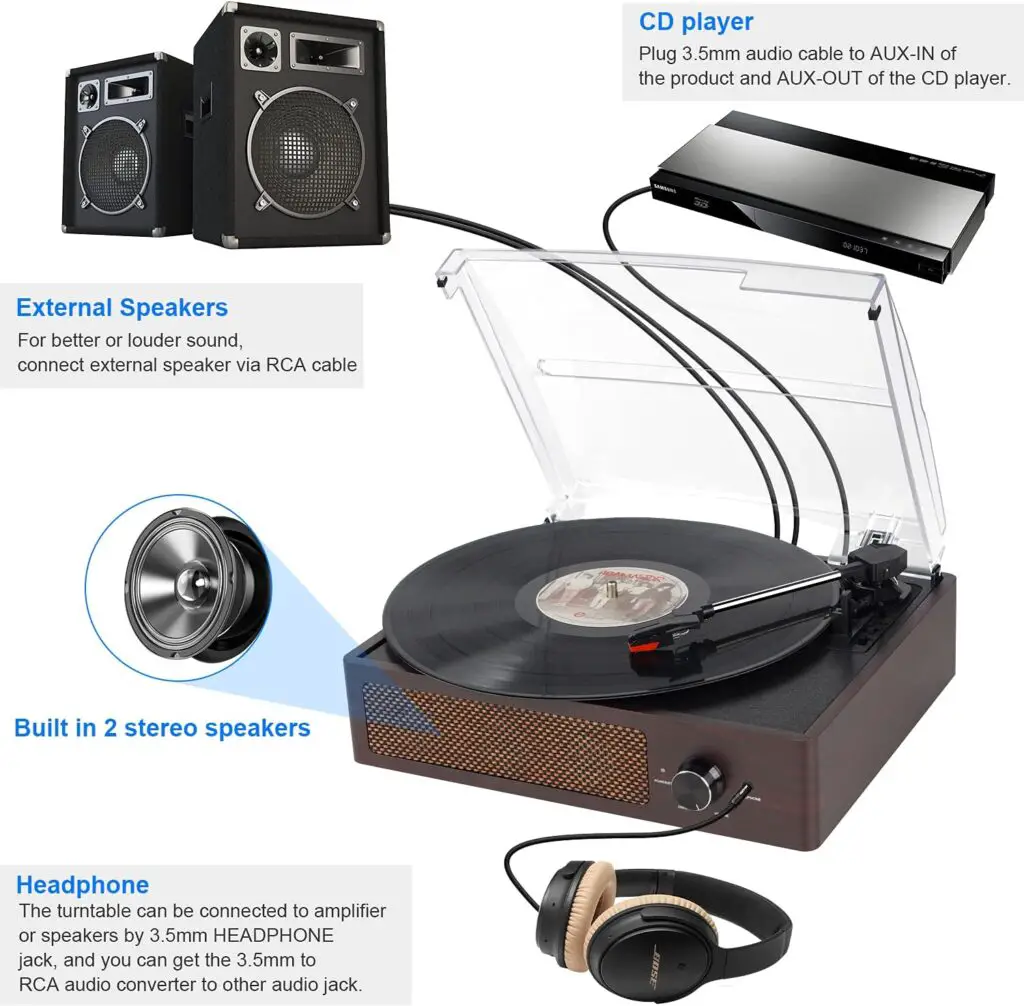
5. Connect the audio source: If you are using an external audio source such as a CD player or turntable, use RCA cables or any other appropriate connection method to link them directly with a receiver or amplifier. Any of the inputs besides the phono input may be used, including CD, AUX and DVD inputs.
6. Connect the equalizer to the receiver or amplifier: Plug another pair of RCA cables from the output connectors on the equalizer unit into the main amp input connections on your receiver or amplifier, being sure that both left and right channels match correctly.
7. Power on and test: Install and turn on all devices, then select the input on your receiver or amplifier that corresponds with your audio source (for instance if your CD player was connected to CD input on your receiver or amplifier, select CD input as the appropriate choice for it). Adjust volume and equalizer settings according to your personal preferences – once this effect has taken place you should hear sound coming through speakers with equalizer effect applied.
Connecting an equalizer with no tape monitor isn’t as difficult as it appear. Utilizing the preamp output as well as the primary amp output connections of your amplifier or receiver it is easy to integrate an equalizer into your system to enjoy a personalized audio experience. I hope this blog entry has been informative and useful.
How to Connect Multiple Audio Sources to the Equalizer
Equalizers, which resemble magic wands for audiophiles allow you to alter the soundscape, increasing or lowering frequencies to create the ultimate sound. What happens when several audio streams compete to be the focus of your equalizer? Be assured that multi-source masters have come to help! This blog is your guide on connect multiple streams of audio to the same equalizer.
The Two-Source Scenario:
Let’s begin with the most commonly found setup: If you have both a turntable and cassette deck that need equalizing, here is how you can bring them together:
1. Gather your gear: Your source materials might require different output types (for instance 3.5mm jacks). Therefore, adapter cables might also be necessary.
2. Become a cable wrangler: Connect one pair of RCA cables from your audio source (for instance a turntable) to the “Tape Out” ports on your equalizer’s Line In ports.
3. Repeat the feat: Grab another pair of RCA cables and connect the “Line Out” ports on your equalizer to the Aux In ports on your receiver or amplifier (where your speakers reside).
4. Flip the switch (or button): Engaging the “Tape Monitor” function on your receiver/amp will ensure audio passes through your equalizer before reaching your speakers.
5. Source switch symphony: Now you can effortlessly switch between turntable and cassette deck, knowing your equalizer will faithfully shape their sounds!
The Multi-Source Multitude:
Have multiple audio gremlins that need equalizing? No worries; most equalizers feature multiple input options such as dedicated “CD In” or “Phono” ports to meet this need. Simply follow these steps for each source to connect it to its designated input on the equalizer; don’t forget to engage the appropriate monitoring function on your receiver/amp, like CD Monitor for each source!
Advanced Techniques:
Feeling adventurous? Here are a few ways you can unleash even greater creativity with your equalizer:
1. Channel Mixing: With multiple equalizer channels available to you, each can be dedicated to different sources, then used to combine their levels prior to sending them directly to your speakers.
2. Source-Specific Equalizing: Are you looking to boost the bass on your turntable while keeping vocals crisp on your CD player? Use a switcher to connect each source to its own equalizer and engage the one of choice accordingly.
Bonus Tip: Label your cables! Doing this will save time when trying to decipher several sources in an audio listening session.
With these tips and some cable wrangling, you’re bound to become an expert at multi-source equalization in no time! Understanding input/output flow as well as making use of monitoring functions on your receiver/amp will enable you to master multi-source equalization quickly! So get out there, connect, and conquer the sonic spectrum with your multi-source equalizer!
Fixing Hubble camera not connecting to monitor: A Step-by-Step Guide